Humans can live for up to two weeks without food, but their ability to function will radically decrease after three days without water. Since 60% of the human body is composed of water, after as fast as six hours without drinking any, you’ll begin to suffer from dehydration as you’ll consume more water than you’ll take in. With that in mind, we can say that water is essential to survive and should be your top priority, particularly in survival scenarios.
The first thing you should do to survive if you get lost or stranded in the wild is think about where to find a source of drinkable water nearby.
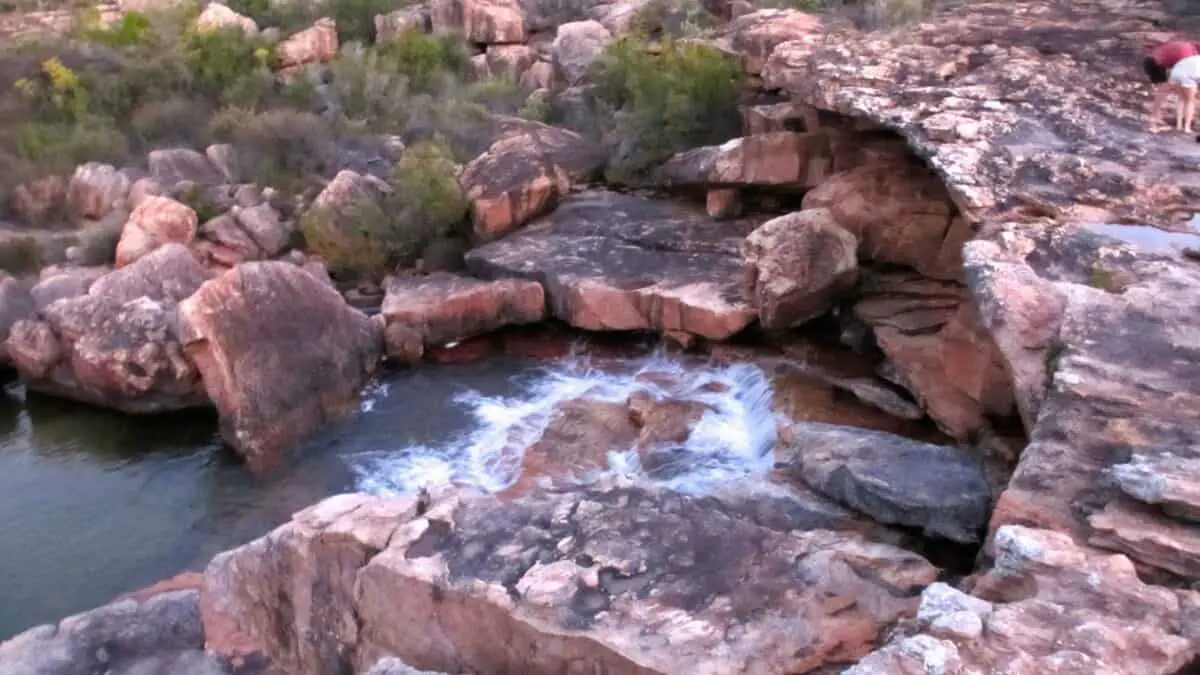
It’s best to get water from fast-flowing sources — rivers, springs, or streams. You can also get some from the groundwater if you find a muddy area. To do so, dig a deep hole and wait until the water seeps in. However, it’s important to filter the water you get from these sources given it’s prone to contamination.
Water is your fundamental need when you go backpacking. It’s a key ingredient when you’re engaging in an activity like hiking. Plus, most hikers know that staying hydrated on the trail is a must. Hence, it’s necessary to look for a water source in case of water shortage. With that, this topic will walk you through several methods for finding water that will work in different areas, whether in tropical, desert, or cold climate. Let’s start.
Choosing the right footwear for your hike is very important. Wearing the wrong footwear could lead to sore feet and blisters which will prevent you from enjoying your hike to the fullest. Lucky for you, we have a list of the best hiking shoes for men, women, and children all in one article.
6 ways to find water in the wilderness
To find water, start with lakes, streams, rivers, ponds, springs, or groundwater. These are the primary water sources, but ensure to filter your water before drinking it. You can also collect rain as it pours from the sky since it’s one of the safest ways to stay hydrated without risking bacterial infection.
So, before we tackle the methods to find water, note that no matter where you find your water — be it from streams, lakes, condensation on plants, snow or ice, dig wells, etc., — it should be filtered/purified to make it safe to drink. The different methods to filter your water are boiling, distillation, solar purification, or reverse osmosis.
1. Streams, lakes, ponds, and rivers
The most typical and the easiest places to access to get water from are rivers, lakes, ponds, streams, or groundwater. These are the bodies of water that you usually see when you go hiking or camping. However, these sources are prone to contamination, so filter the water first to make it safe to drink. As much as possible, look for fast-flowing water in higher areas and away from human habitations and livestock to decrease the possibility of contamination.
For instance, check if there’s any animal bones or green vegetation growing around the water, as these are signs of pollution. If you find such things, avoid drinking water from there, as filtering doesn’t easily remove chemicals present in such elements. Also, be careful if there are a lot of mineral deposits along the edge of the water, which could indicate an alkaline condition.
2. Muddy areas
If you find a muddy area, you may find groundwater. To do so, dig a deep hole and wait until it fills up with water. This groundwater will be muddy, but straining through a cloth will clean it up. Although, it’s important to remember the risks any time you drink untreated water.
Also, look in places where you might find a puddle — valley bottoms, dry stream beds, etc. Checking under patches of green vegetation may also be a good option.
3. Help from wildlife
Humans need water, and so do animals. Luckily, animals always know where water is. To find some as well, you don’t necessarily need to see the animals; you can just follow game trails downhill, which will often lead to water.
However, bear in mind that most wild creatures urinate and defecate in the same place they drink. Thus, once you’ve located water, move at least a couple of hundred yards from the spot where the game trail meets the water, preferably upstream.
Birds can lead to water as well. When birds are heading toward water sources, they fly low and straight. When returning, they fly from tree to tree, resting often. Focus on grain-eating birds, like pigeons. Birds of prey and water birds do not drink frequently, making them poor indicators of nearby water sources.
4. Fruits/plants
Fruits, cacti, fleshy/pulpy plants, and even roots contain a lot of water. Therefore, you can simply collect the plants, place them into some kind of container, and smash them into a pulp with a rock to collect their liquid.
This method is very helpful in tropical environments, where fruits and vegetation are abundant. Coconuts can be an excellent source of hydration as well.
5. Collect morning dew
In the morning, when all the vegetation is covered in dew, you can collect it. To do so, use a cloth to soak up all the moisture and squeeze it out into a container. If the vegetation is low on the ground, you can tie the cloth around your ankles while walking through it.
6. Collect rainfall
Collecting or drinking rain that pours directly from the sky is one of the safest ways to stay hydrated without risking bacterial infection.
To collect rainwater, you can either use containers, tie a big plastic around trees, or place a small rock to create a depression and let the water be collected. You can also bend large leaves into a funnel shape. Drink it straight from the containers or store it in your water bottle. But most importantly, stay rehydrated.
If there aren’t any nearby water sources, look for natural water catches, like puddles. You can often find puddles of water on mountain rocks or in valleys.
Sometimes, encountering problems while you’re out hiking cannot be avoided. They can be as simple as painful blisters or as serious as dehydration and fatigue. Read our article to learn about the most common hiking problems and how to avoid them.
3 ways to find water in snowy or cold areas
In cold areas, melted snow or ice will give you water. You can use fire to melt snow by placing the water near the fire and use a container to catch the drops. If a fire is not an option, use your body heat to melt snow. First, put the snow in a bottle, then place it inside your jacket or cloth until it melts.
In a cold climate, if the area doesn’t provide any flowing bodies of water, such as rivers or streams, then you can find water by collecting clean —not yellow— snow. Then, put a small amount at the bottom of a pan, and heat it gently until it melts. Keep adding small handfuls until you have melted the desired quantity. It’s a good idea to cover the pan to liquefy snow faster to save fuel.
Note that melting snow is preferred to eating it directly, so that you avoid lowering your core temperature. Whenever possible, choose ice over snow because you’ll get more water for the energy you use to melt it.
Check the other feasible ways to melt snow and ice below.
1. Use your body heat
Use your body heat to melt snow by putting the snow in a container, like a water bottle, a bag, or a can. Place the container inside your coat or between multiple layers of clothing. The heat of the remaining water in the bottle and your body heat are enough to melt the snow.
This simple yet effective method doesn’t require you to stop and make a fire. It also works in the worst weather conditions.
2. Use the sun
Putting snow in a black garbage bag in the bright sun will melt the snow, thus offering you drinking water. To do so, fill a no-hole black plastic garbage bag with snow, and place it directly under the sun. Wait for two to three hours, then boil the water to purify it.
You can also place the clean snow in a clear Ziploc storage bag, on top of the black plastic solar collector. You’ll get water conveniently made inside the easy-to-handle Ziploc bag! If you don’t have a Ziploc bag, use water bottles instead. Wrap them in black duct tape and go through the same process.
3. Take a bandana and a container
Use a bandana and a cup or a container if you don’t have a metal container to dissolve snow near a fire. Simply open the bandana flat, then fill the middle part of it with clean snow. Tie every corner of the bandana so that it holds the large snowball. Suspend the bandana near the fire, using a sturdy branch as the heat will start melting the snow.
The snowball will start dripping through the bandana. Use a cup or another container to catch the drips. Check from time to time to make sure that your container is still catching the drips and not overflowing.
While snow and ice provide an excellent source of water, it’s important to remember that freshly melted snow is generally considered to be safe to drink without further treatment. However, you shouldn’t assume that because water is frozen, it’s safe to drink. It should always be melted and purified first.
Moreover, avoid eating straight snow/ice, as this will lower your body temperature, thus taking away your warmth and making you cold.
Conquering the wilderness can become terrifying, stressful, and exhausting. But, no matter how scared you are, you have to develop a plan on how to handle the situation. To help you get over your anxieties, follow our 8 important steps to survive in the wilderness.
4 ways to find water in the desert
Humans most likely can’t survive without water for more than three days, and it can be extremely hard to find some in the desert. Digging wells takes a lot of effort but represents a good source of sufficient water. Simply nudge a large hole a few feet deep, and wait until the water starts to seep in.
It’s reasonable to think that the desert is dry and unproductive at first glance. Indeed, you can’t find obvious water sources, such as lakes, puddles, ponds, or other standing pools of water like in other locations.
The following areas are other possible water sources that you might encounter in the desert.
-
Canyons and valleys
Given that water flows downhill, check lower grounds, such as the basin of canyons or valleys. Water seepage in canyons, along the high water line of previous floods, may yield water in the rock formations, especially if has rained recently. Occasionally digging at the base of rocks and mountains can reveal water.
-
Flora and fauna
Another indicator of a water source is the presence of animals, insects, and vegetation nearby. Listen and look for birdsongs, flocks flying overhead, or tracks and trails on the ground. You can also look for plants that grow only where there is water, like sycamores, willows, cottonwoods, salt cedars, cattails, etc. You need to dig to find water.
Also, if you’re familiar with cactus as a good source of water, then cut off the top and squeeze the pulp. However, don’t eat the pulp, only drink the squeezed juice, as we do with lemons or limes.
-
Water from the ground
If you notice dampness or green vegetation on the ground, these can indicate underground water. In such cases, start digging. Dig a large hole a few feet deep, and you’ll likely see water seeping in. Look in the areas near valleys, dry river beds, or behind the first dune of desert lakes.
This may not be successful, but there’s still a possibility. The water from these sources will of course be muddy, so it will need filtering/purifying to make it clean and safe to drink.
-
Collect condensation from metal
Extreme temperature variations between night and day can cause condensation on metal surfaces. Before the sun rises and vaporizes that moisture, collect it with an absorbent cloth. This also means you should be keeping your metal items out in the open rather than stored in your pack.
Whether you’re a beginner or a seasoned hiker, it’s vital to acquire some skills in order to survive in the backcountry. There are many skills you could learn and we’ll be talking about the 6 survival skills you’ll need in the wilderness.
Frequently asked questions about finding water
We answered a few questions that you might have when it comes to finding water in the wilderness.
1. Can you filter viruses from water?
A water filter is designed to only remove waterborne bacteria and protozoa, but not viruses. The number of pathogens present after filtration is still considered as being too high for drinking water, given that a pathogen is an organism that causes diseases. The most usual waterborne viruses found in natural water sources included Norovirus, Enteric, and Hepatitis A.
The most common disinfectants used are chlorine, chloramine, or iodine. Ozone and UV light can also be used to remove pathogens from large volumes of water. Boiling is also a good bet to kill viruses present in the water.
In case boiling water is not possible nor available, chemical disinfection may be a viable substitute. Moreover, Reverse Osmosis filtration has proven very high effectiveness in removing viruses in the water.
2. Why can’t you drink water straight from natural water sources?
With the increase of livestock, humans, and animals near natural water sources, water quality is declining. Even if the water from the environment looks clean, there’s a microorganism living on it.
Water found naturally in the environment, like in streams, rivers, lakes, or groundwater, is not recommended to be drunk directly without proper treatment. These water sources are susceptible to water contamination given that natural water can be home to bacteria, parasites, viruses, and many infectious microorganisms.
Just know that any raw water you ingest without purifying it first represents a risk for you. Consuming biological contaminants can lead to vomiting and diarrhea, which will only lead to further dehydration. Thus, treat the water first to make it safe to drink. Boiling is one of the effective methods to kill such microbial contaminants.
Once you’ve purified the water, store it so that it doesn’t get contaminated again. You can use clean containers or reusable water bottles if you have any.
3. Is the water in pits and ponds safe to drink?
It’s unsafe to drink water directly from pits and ponds as these open sources contain parasites and bacteria. If you consume any of these contaminants, you can contract illnesses like giardia or cryptosporidium (for example, diarrhea, bacterial infections, stomach cramps, or vomiting).
Some contaminants, such as arsenic, also known as carcinogens, can potentially contribute to severe health issues. You can’t risk your life by simply drinking untreated water from the environment.
But, if you’re interested in getting drinkable water from these sources, see to it that you treat the water first to make it safe to drink. Water filtration/purification is a process that is used to remove impurities from water such as bacteria, algae, parasites, biological contaminants, and other microorganisms living in natural water.
These are the several methods we can recommend to filter your water:
- Boiling;
- Distillation;
- UV water purification;
- Chemical treatment;
- Reverse osmosis, and other water filtration/purification.
Apply these techniques to have clean and safe drinkable water.
Conclusion
Now that you understand the importance of (clean) water, how and where to find it, and the aforementioned potential risks you can get from directly drinking from water sources — whether in the wilderness, in the desert, or in cold areas — you can apply these tips whenever you run out of water or are facing a survival situation. Also, you better conserve water.
After all, all these ways to find water are effective and helpful when needed. However, make sure to use the process that you think best works for you. Bear in mind to treat the water first to make it safe to drink. You can use our recommended methods to filter your water. Carrying a water bottle filter/purifier will help a lot.